IBM WebSphere Portal - Usage
Before you begin
- The IBM DevOps Deploy agent must be installed on the system that hosts the Portal Node.
- If WebSphere Portal Server is deployed in a directory other than the default directory, you must set a property on the agent before you can run the WebSphere Topology Discovery step.
- Go to Resources > Agents > agent-name > Configuration > Agent Properties.
- Add a property that is named
wsadmin.path. - Set
wsadmin.pathto the fully qualified path to the wsadmin script (including the script name).
Procedure
- Install the WebSphere Application ServerDeployment plug-in. Skip this step if the plug-in is already installed.
- Add an agent.
- Hover your mouse over the row for the resource group, click Actions, and then select Add Agent.
- Wait 1030 seconds, then click Refresh. A twistie is now next to the agent. When you expand it, a subresource cell,
WebSphereCell, is displayed. - Hover your mouse over the row, then click Edit.
- Enter values for the following properties.
WebSphere Profile PathWebSphere UserWebSphere Password. If this value is left blank,soap.propertiesis used to locate the password for the user.Leave theCell Nameproperty blank.
Note: The SOAP port that is defined in the cell properties must match the WasSoapPort property that is defined in the wkplc.properties file. For more information, see Properties file: wkplc.properties. 5. Click Save. 3. On the Resources page, click the Actions push button that is associated with the WebSphereCell resource, and then click Configure using WebSphere Topology Discovery. The discovery step runs. This step might take several minutes. A log is displayed to show progress. 4. When the discovery process completes, close the log window, and then refresh the resource tree. Resources that represent the WebSphere Application Server components are displayed in the resource tree. 5. Define properties for the WebSphere_Portal resource, which is located under *cell\_name*/Nodes/*node\_name*/Portal Servers in the resource tree. Click the resource, then the Configuration tab, then Resource Properties. The Edit Resource window is displayed, with Role set to PortalServer. The heading of the properties table is Role Properties: PortalServer, as shown in the following screen capture.
For ND topology, define the properties for
Portal Cluster,Portal Primary Node, andPortal Secondary Noderesources.For a stand-alone topology, define the properties for the
Portal Noderesource.Define the following properties:portal.home: Portal installation directory, by default/opt/IBM/WebSphere/PortalServerportal.profile.home: Portal profile directory, by default/opt/IBM/WebSphere/wp_profileportal.admin.user: Portal administrator user name, by defaultwpsadminportal.admin.password: Portal administrator password, by defaultwpsadminportal.config.port: Portal configuration port, by default10039websphere.password: WebSphere administrator passwordNote: Theportal.config.portproperty must match theXmlAccessPortproperty that is defined in thewkplc_comp.propertiesfile. For more information, see Properties file: wkplc_comp.properties.
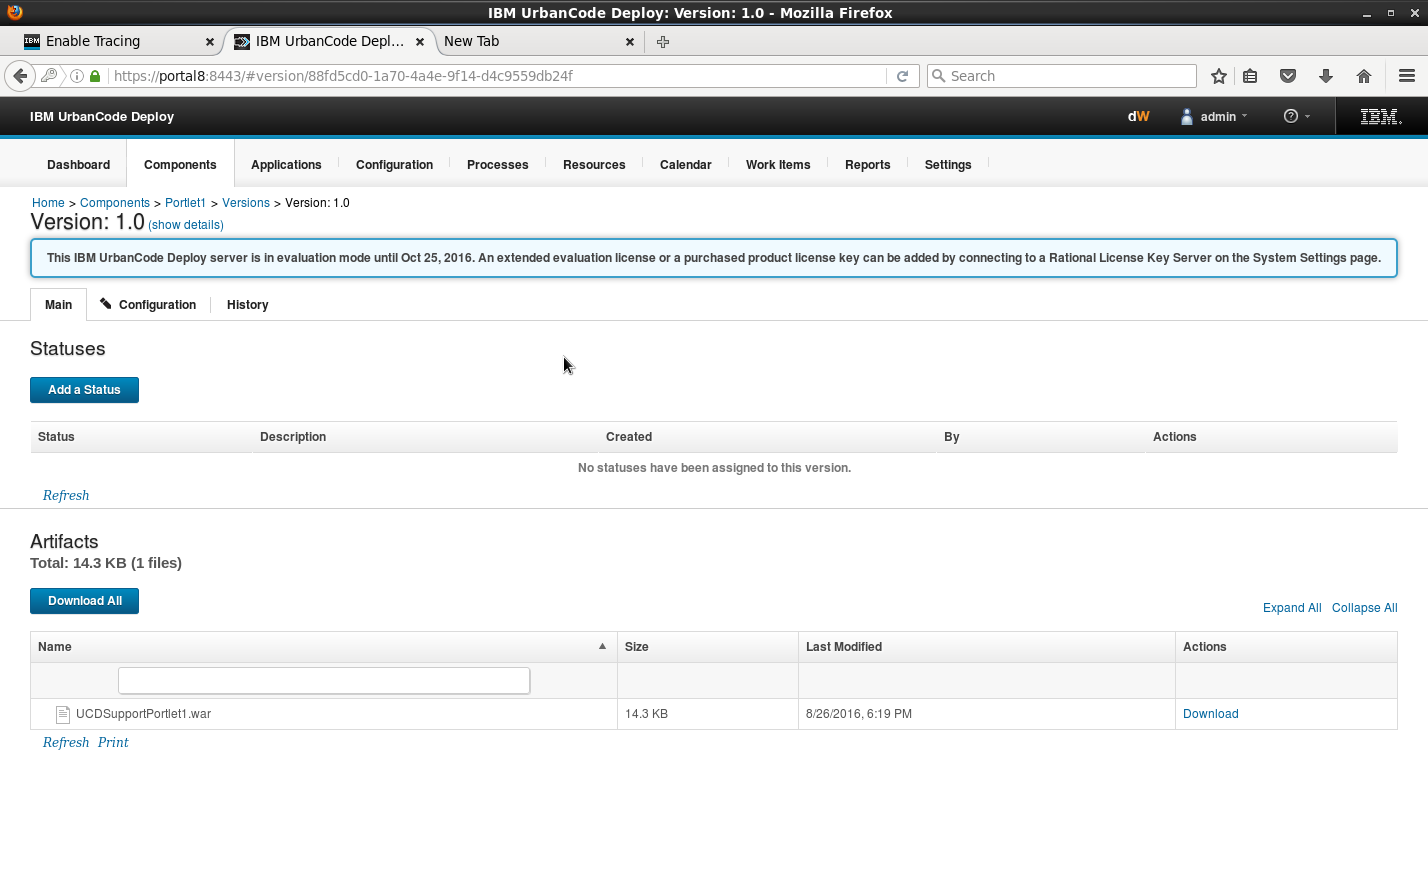
- Create components for the resources. You need one component for each resource to deploy. The following example screen capture shows a portlet WAR file that is stored in the root of a component.
- Add the components to the resources.
- Go to the resource.
- Select Actions > Add Component.
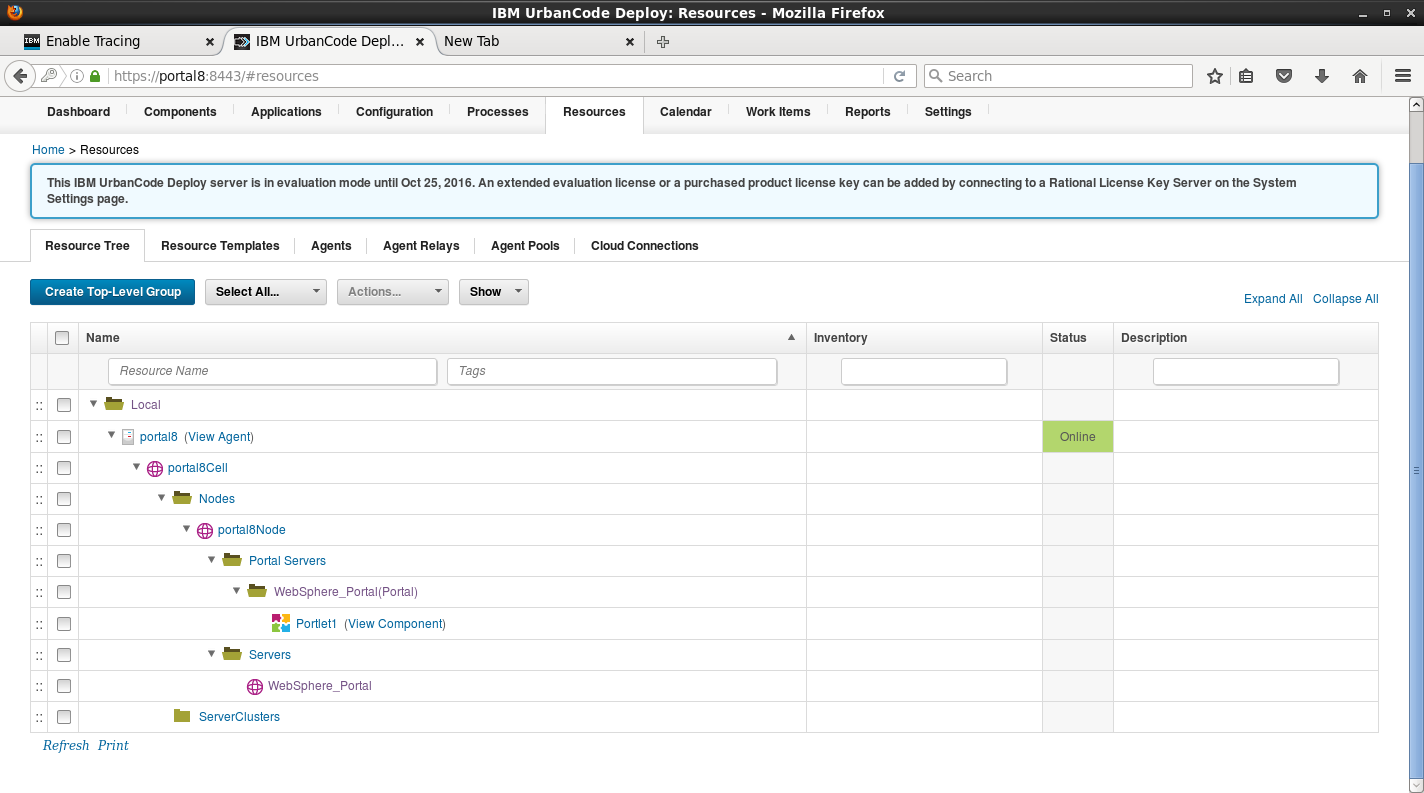
- Select the component to use.The following example screen capture shows a portlet component that is mapped to a Portal server.
- Create the application.
- Go to Applications.
- Click Create New Application (if one does not exist). You can also use an existing application that is attached to the cell to manage.
- Enter an application name, then click Save.
- Click the Components tab, then add the component that was created by the template generation procedure.
- Create an application environment.
- In the Resources page, click Create New Environment.
- Enter an environment name, then click Save.
- Go to the environment editor.
- Click the environment name, then click Add Base Resource. Choose the group for your exemplar cell and environment.
- Create a component process of type Deployment to deploy a Portal WAR file.
- On the component page, click Processes, and then click Create Process. The Create Process window is displayed.
- Specify a name for the process, select Deployment in the Process Type list, and then click Save.
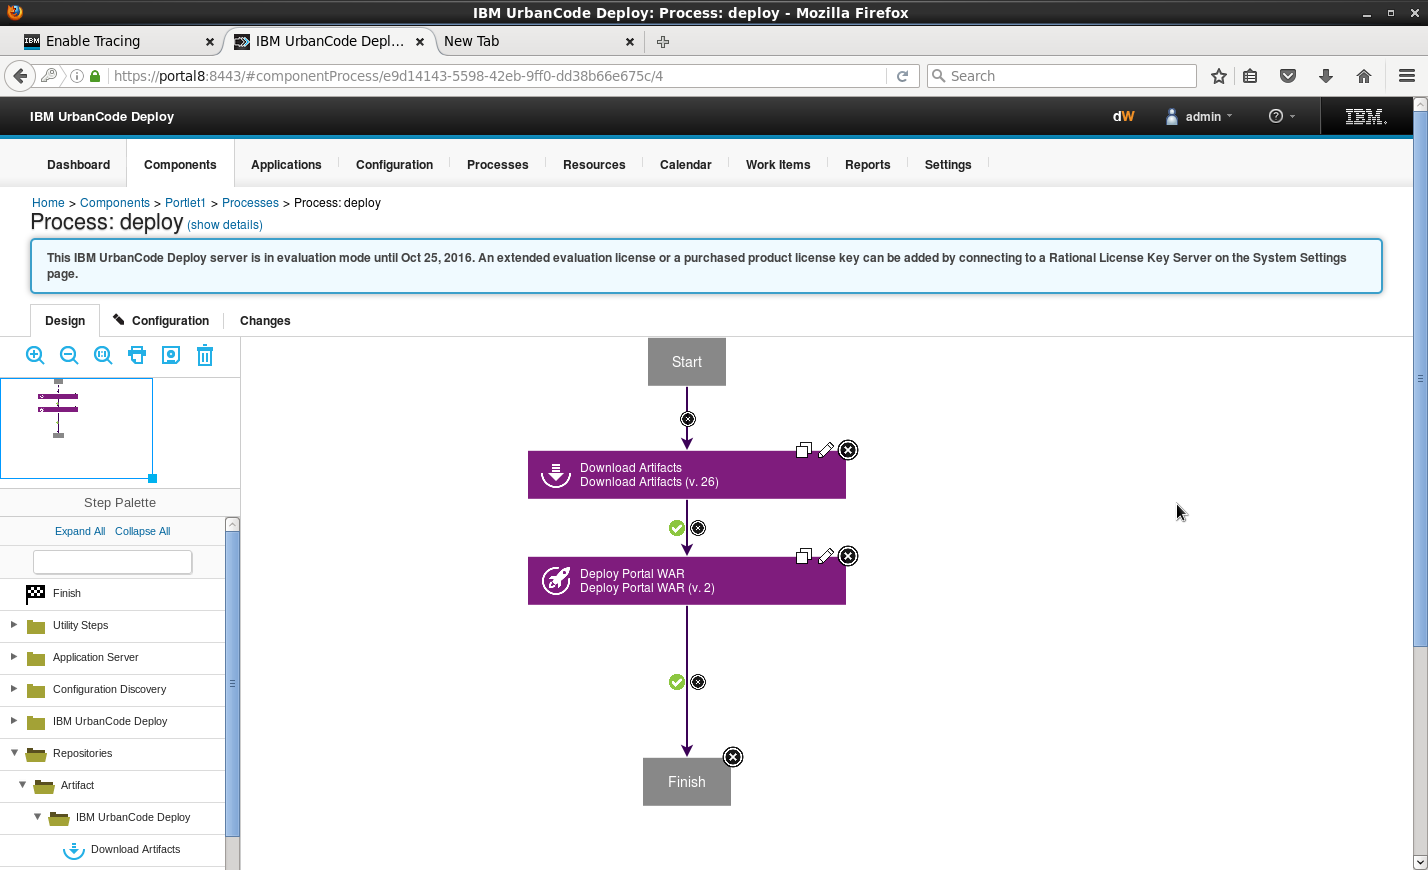
- Add a Download Artifacts step and then a Deploy Portal WAR step to the process. The following example screen capture shows a component process that deploys a portlet WAR file.
 If you edit the Deploy Portal WAR process step, and then select Show Hidden Properties, you can see that the step properties correspond to the properties that you defined in step 5 previously.
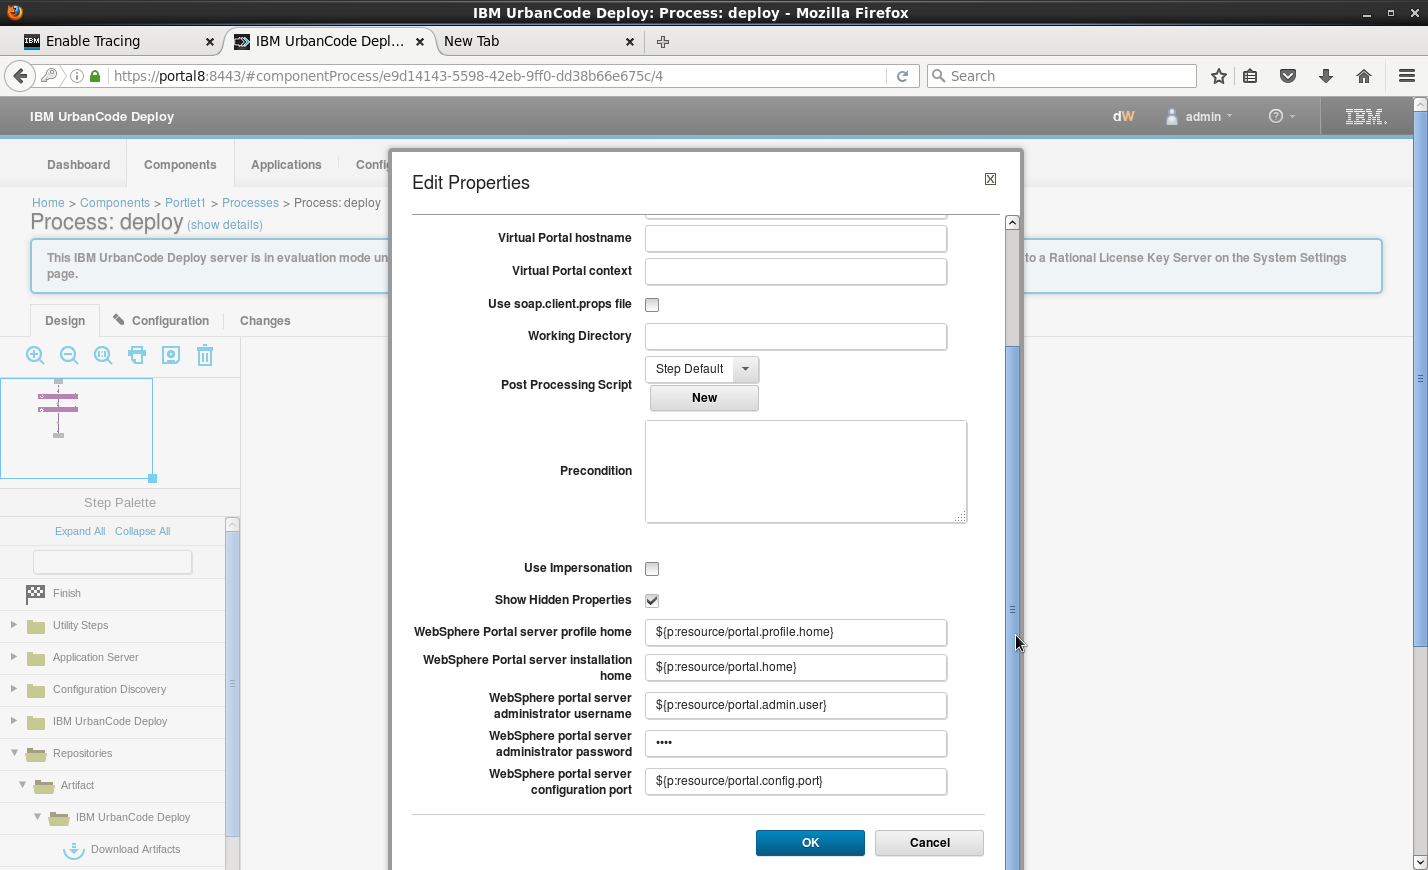
- Save the process.
- Create an application process to install the component.
- On the application page, click Processes, and then click Create Process. The Create Process window is displayed.
- Drag the Install Component step onto the process editor.
- Select the component and component process that you created previously.
- Click Save.
- Save the process.
- To test the newly created component, run the application process on your environment.


Open WebSphere Portal, and then search for the portlet by name. The portlet is displayed, as shown in the following screen capture. You can now add the portlet to a page.