YAML Executor - Steps
Importing YAML configuration file into DevOps Velocity
Import the YAML configuration file into DevOps Velocity by using any one of the following methods:
Method 1: Using GitHub plug-in
Integrate DevOps Velocity with a GitHub repository that contains the ucv.yml file to import the YAML configuration file into DevOps Velocity.
Perform the following steps to import the YAML configuration file using GitHub plug-in:
Log in to DevOps Velocity.
Click Settings>Integrations.
In the Installed tab, click Add Integration for the installed GitHub plug-in.
Note: If the GitHub plug-in is not installed, go to Available tab and click Install for GitHub Plug-in.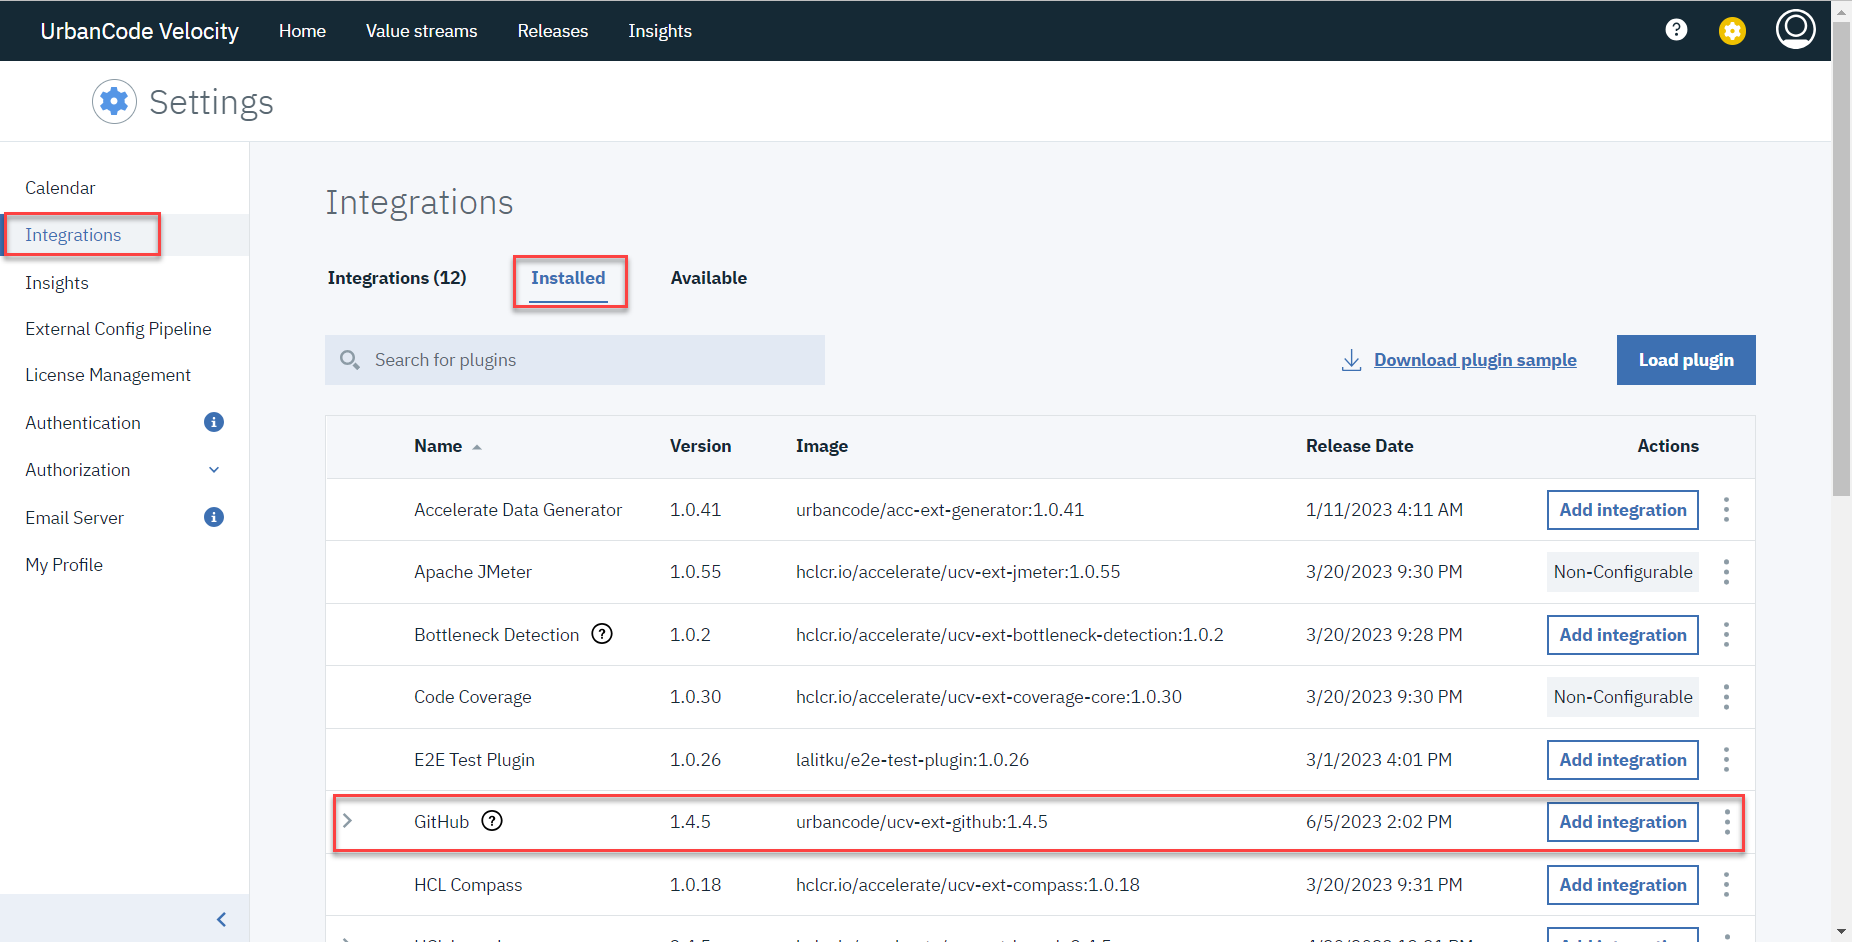
Enter the details in the required fields to add GitHub integration.
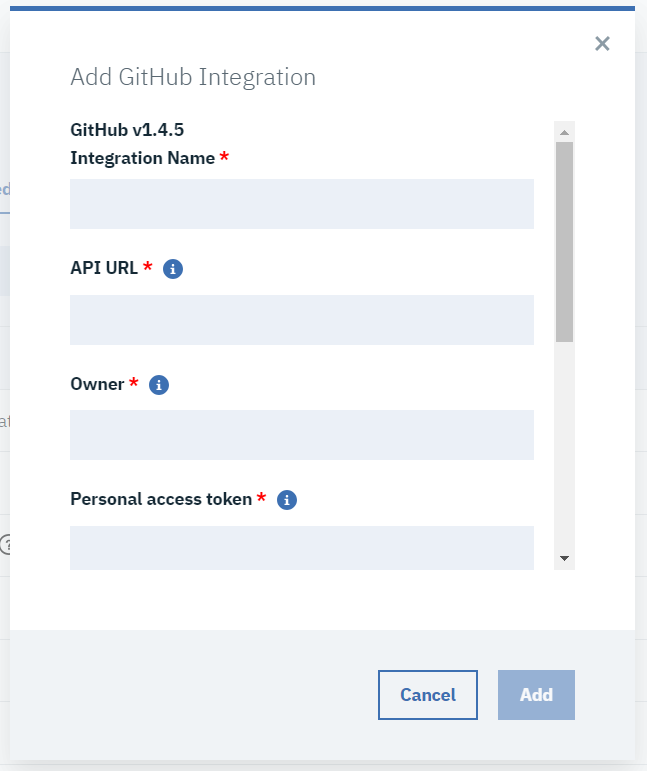
Click Add to save the details and enable the integration.
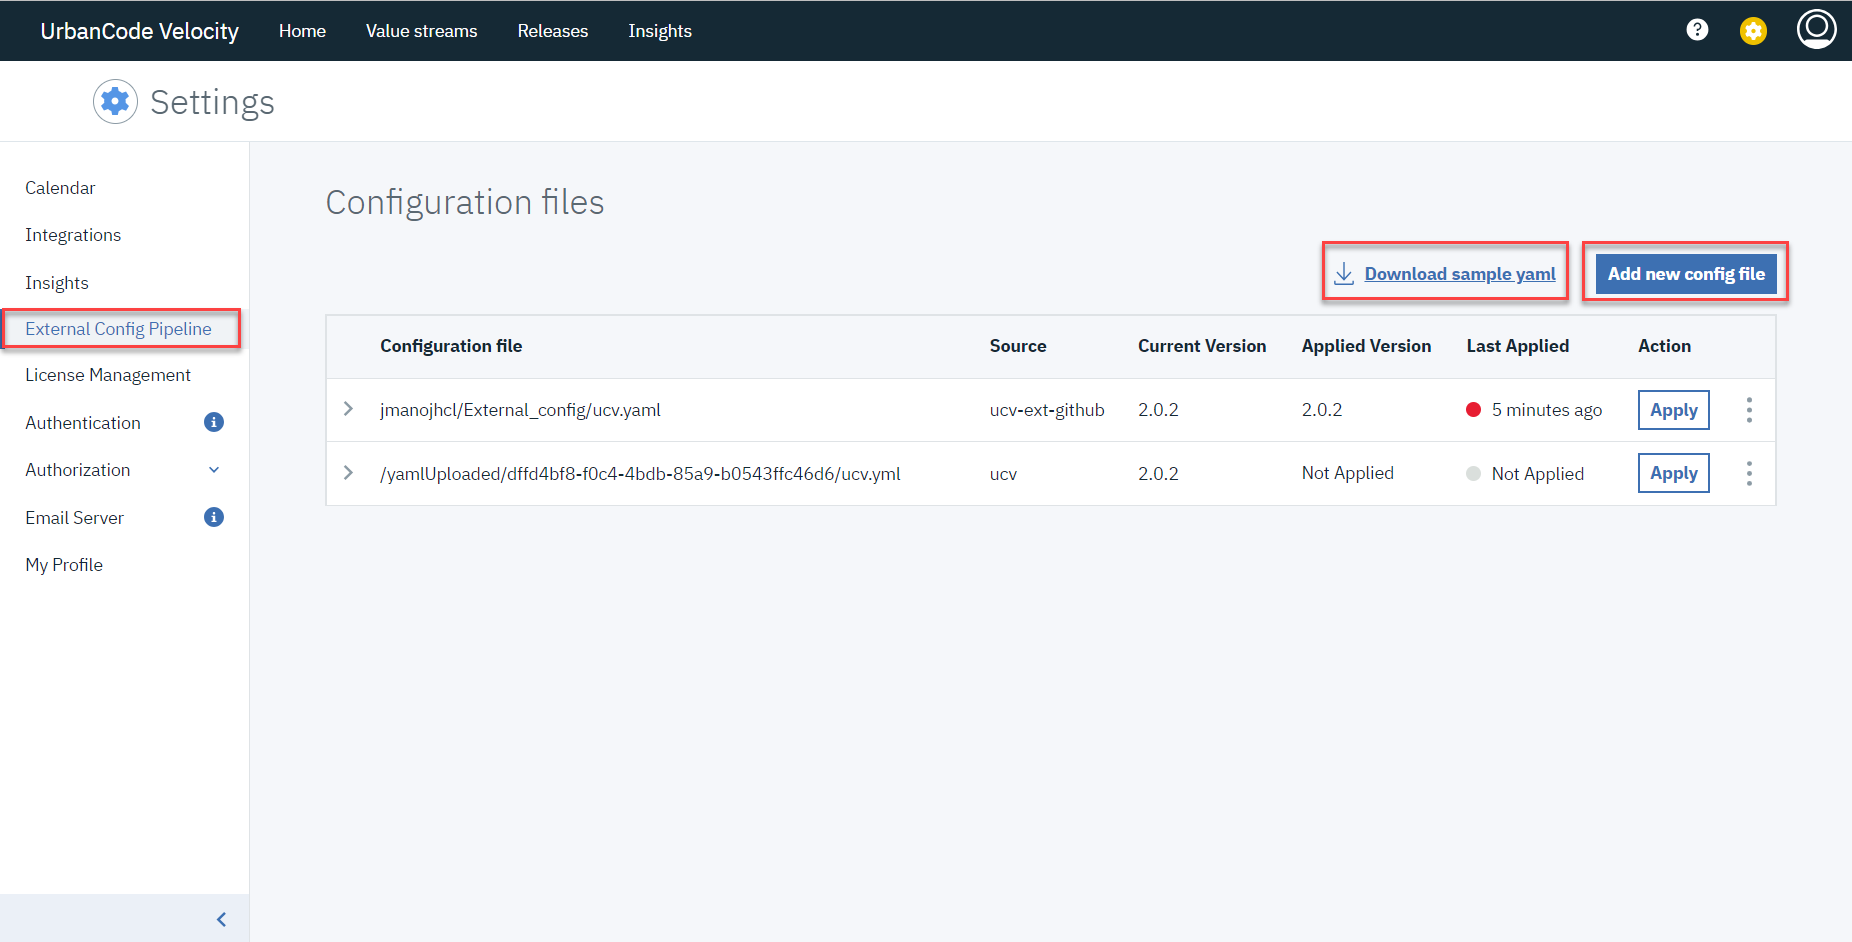
The YAML configuration file from the GitHub repository is automatically synced to DevOps Velocity and displayed under Settings>External config pipeline.
Method 2: Using user interface
You can import the YAML configuration file into DevOps Velocity using user interface if it is not hosted in a GitHub repository.
Perform the following steps to add YAML configuration file using user interface:
Log in to DevOps Velocity.
Click Settings>External config pipeline.
Click Download sample yaml to download the sample YAML file.
Edit the sample file with the actual values of your configuration.
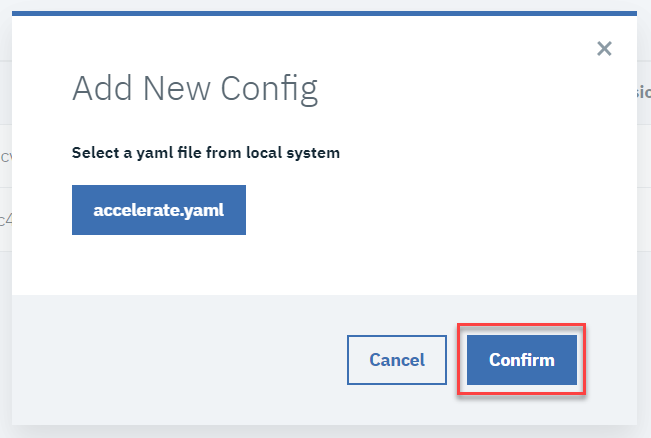
Click Add new config file.
 Add New Config dialog opens.
Click Choose file to select the edited file.
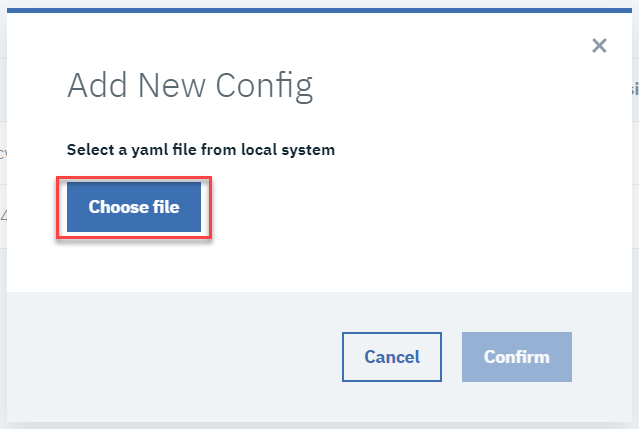
Click Confirm to upload the file.
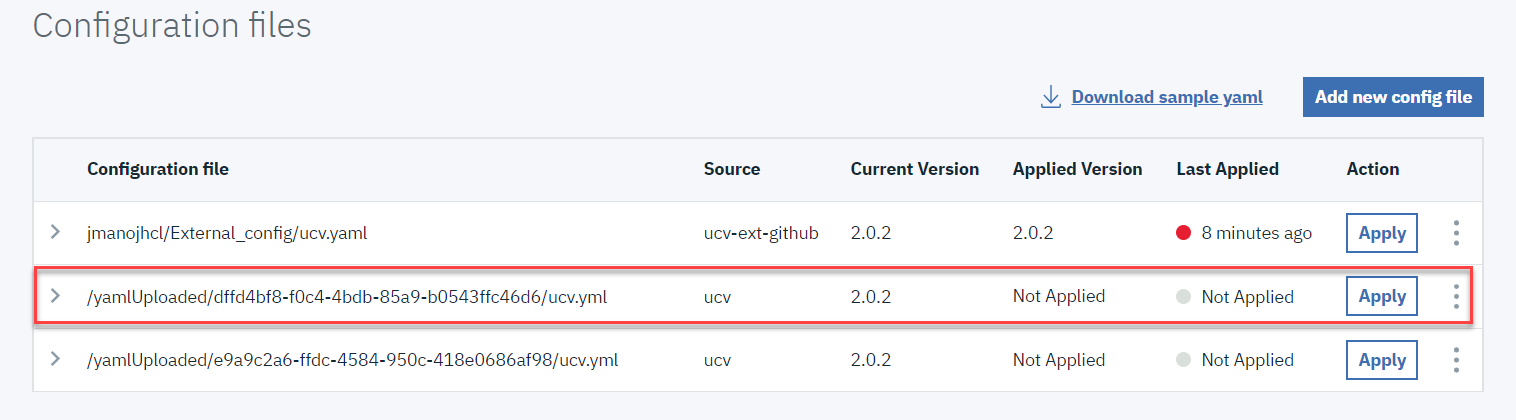
The uploaded YAML configuration file is displayed in the list.
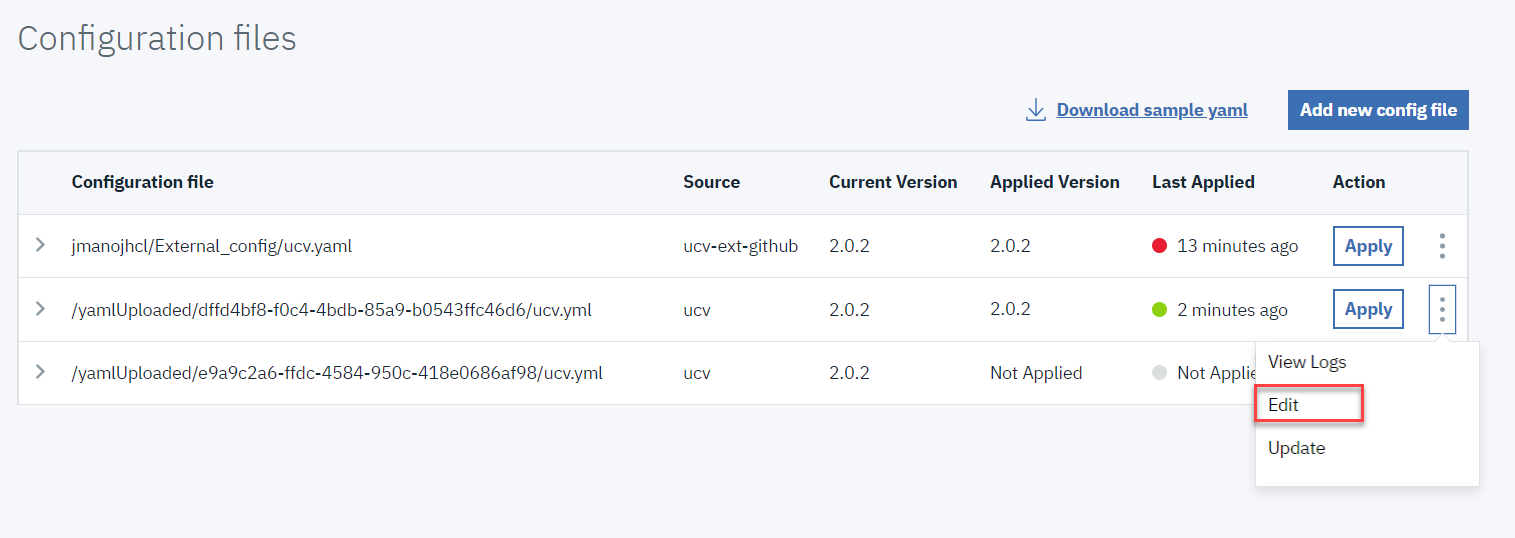
To edit the existing YAML configuration file, perform the following steps:
Click overflow menu of the YAML configuration file and then click Edit.
 The The existing YAML configuration file will download.
The Edit the downloaded YAML configuration file.
Click overflow menu of the YAML configuration file which you have edited and then click Update. Update config dialog opens.
Click Choose file to select the edited file.
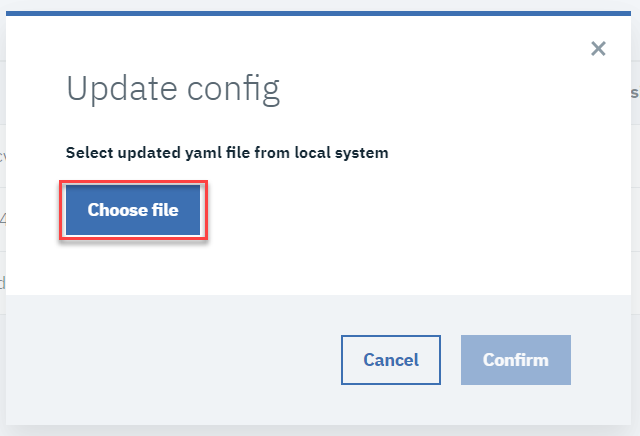
Click Confirm to upload the file.
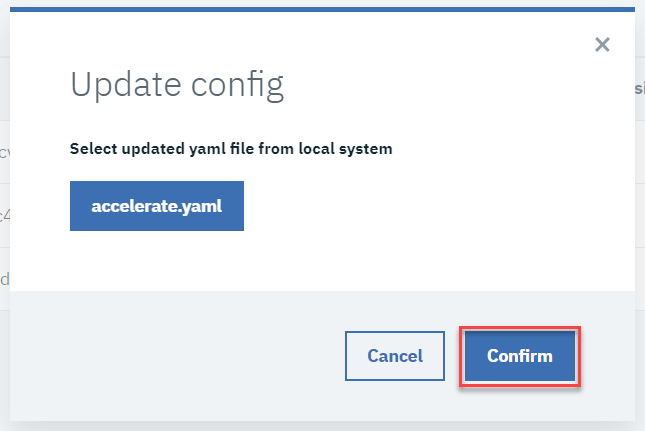
The updated YAML configuration file is displayed in the list.
Applying YAML configuration file
Once you have the YAML configuration file in DevOps Velocity, perform the following steps to apply the configuration:
Log in to DevOps Velocity.
Click Settings>External config pipeline.
Choose the required YAML configuration file in the list and click right angle bracket to preview the configuration details.
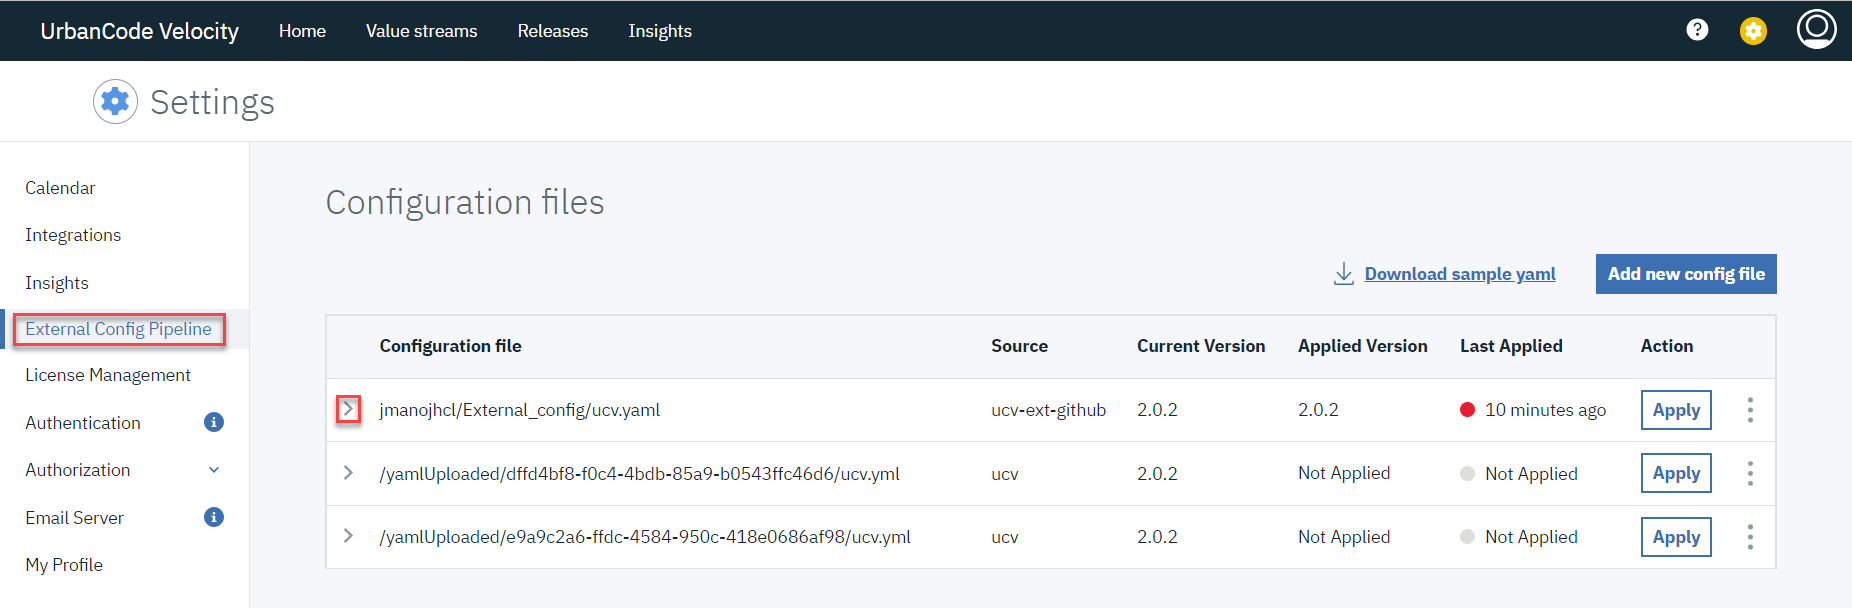
Click Apply for the required YAML configuration file.
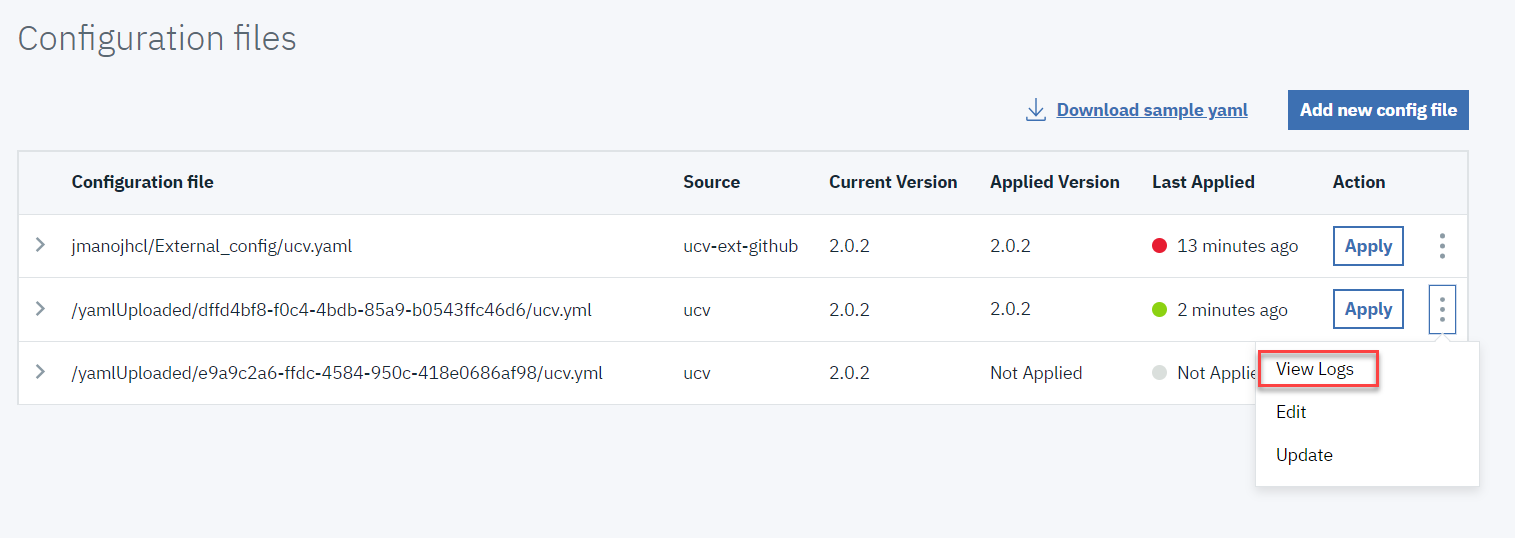
Click overflow menu for the required YAML configuration file and then click View Logs to view the logs of the applied YAML configuration file.
YAML configuration file properties
The YAML configuration file is used to define configuration settings for automating the initial setup process for integrating various CI/CD tools into DevOps Velocity.
YAML File Structure
The following table describe the properties used to define the configuration in the YAML file.
| Property name | Type | Description | Required |
|---|---|---|---|
| version | String | The version number of YAML file. | Yes |
| integrations | Array | List of integration configurations. | Yes |
Integrations
The following table describe the properties that you must define under integrations:
| Property name | Type | Description | Required |
|---|---|---|---|
| type | String | Type or category of the CI/CD tool. | Yes |
| attributes | Object | Additional attributes specific to the integration. | Yes |
| configs | Object | Configuration object for the integration. | Yes |
Configuration Object
The following table describe the properties that you must define under configs :
| Property name | Type | Description | Required |
|---|---|---|---|
| name | String | Name of the configuration. | Yes |
| loggingLevel | String | Logging level for the integration. | Yes |
| deltaTime | String | Optional: Time difference for the integration. | Yes |
For additional configuration properties depending on integration type, navigate to respective plug-in and look for general configuration properties section for more details.
Sample YAML configuration file
Following is the sample YAML configuration file with existing integration.
version: "8.0.0"
integrations:
  - type: ucv-ext-launch
    name: Test
    attributes:
      auto-config: true
      application: [
         "Test1"
      ],
      appEnvOrder: ["QA", "DEV", "PROD"]
      integrationId: 12345678,
      team: Loop3
Replace the property values in the sample file with the actual values specific to your configuration.
Customizing YAML configuration file
Perform the following steps to customize the YAML configuration file for your required integrations:
- Open the YAML configuration file in a text editor.
- Update
versionproperty with the appropriate version number. - Under
integrationsproperty, add or remove any property as required. - For each integration, add
type,attributes, andconfigsproperty.nameis optional if we want to overwrite valuestream name. - In valuestream, To filter pipeline based on application add
applicationsandteamsto map value stream against the team. - Under
configsproperty, you must add the required properties based on the integration type. ifintegrationIdis specified then configs is optional. - To order the environment while syncing, use the
appEnvOrderproperty. - Set the
auto-configattribute to true for enabling automatic setup of pipeline applications processes and environments after creating a new integration. - Save the YAML configuration file.