Usage
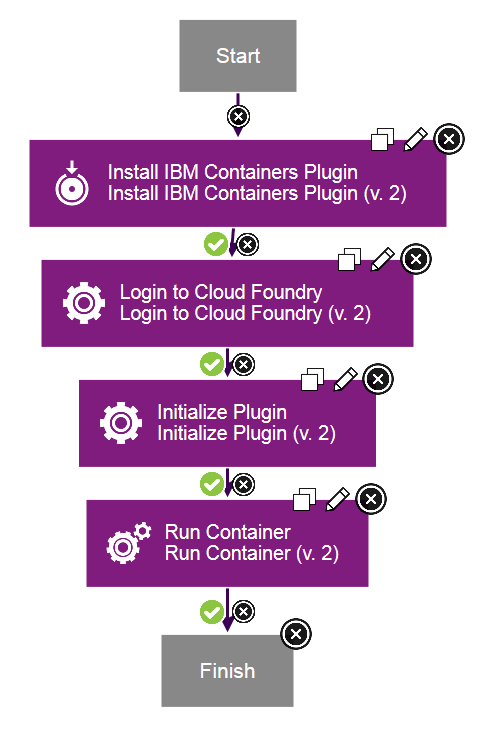
To use the steps in the plug-in, you must first install and initialize the plug-in. To install and initialize the plug-in, complete the following steps in the process editor:
- Add the Install IBM Containers Plug-in step to the process. Ensure that the Cloud Foundry CLI Path field is set to the directory that contains the Cloud Foundry command-line utility.
- Add the Login to Cloud Foundry step to the process. Again, ensure that the Cloud Foundry CLI Path field is set to the directory that contains the Cloud Foundry command-line utility. Also, specify the Cloud Foundry user name, password, and API endpoint. Optionally, specify the Cloud Foundry organization and space.
- Add the Initialize Plug-in step to the process. This step initializes the command-line interface to use the plug-in that is installed by the Install IBM Containers Plug-in step.
After these steps have run, the plug-in is installed and initialized. You can now run the following plug-in steps: Build Image from Dockerfile, Run Container, Start Containers, Stop Containers, Set Namespace, Request IP Address, Release IP Address, Bind IP Address, Unbind IP Address, Execute Command On Container, Create Group, Remove Group, and Update Group.
The following screen capture shows an example process that installs and initializes the plug-in, and then runs a container: